How to import a GLB model into Blender
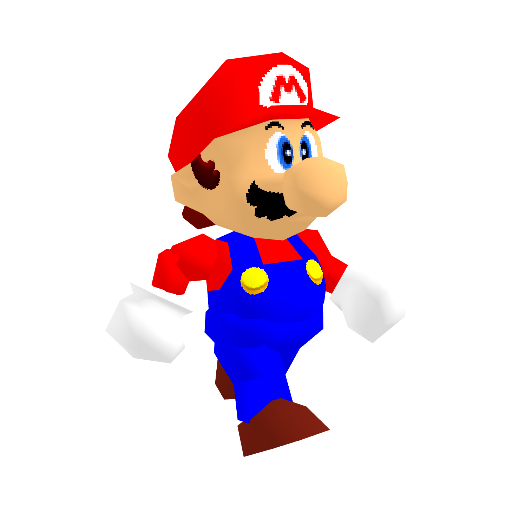
Use this walkthrough to bring a downloaded Nostalgia64 model into Blender and check what survived the import. The example is Mario from Super Mario 64, whose catalogue entry includes a rigged model and the default clip 72 - Walking. Keep the asset page open as a reference while you work.
1. Inspect and save the complete model
- Open the Mario asset page. Use Orbit and Zoom to inspect the shape, then toggle Wireframe to examine the geometry. Switch Lighting off and on to separate material colors from scene lighting.
- Search the animation picker for 72 - Walking. Watch it at 1×, then pause. Note which parts move so you can compare the imported animation later.
- Download the GLB. If the site prepares a multi-part file, wait for verification and click the resulting Save link. Keep that original file unchanged and create a separate folder for your Blender project.
2. Import the GLB
- In Blender, choose File → Import → glTF 2.0 (.glb/.gltf), select your saved GLB and import it. GLB is the binary form of glTF, so you do not need to convert it to OBJ first.
- Find the imported objects in the Outliner. Select the mesh and use View → Frame Selected in the 3D Viewport if it is outside the current view. Inspect the imported hierarchy before moving or deleting objects.
- Switch to Material Preview to check the textures. Rotate around the model and compare its silhouette, visible surfaces and orientation with the catalogue preview.
- Save a new .blend file. Keep the GLB alongside it as an untouched reference, especially before changing the rig, applying transforms or replacing materials.
3. Check materials and animation separately
A successful mesh import does not by itself confirm that every animation is playing. Select the imported armature and inspect the Dope Sheet’s Action Editor and the Nonlinear Animation editor. Blender versions and import settings can organize imported clips differently. Find the walking clip, check the active action or track and set a suitable timeline range before playback.
Compare the same clip on the asset page and in Blender. Do not scale the keyframes just because the Blender scene’s frames-per-second setting differs from an assumed game rate. First check the clip’s duration and the scene’s playback settings. The catalogue’s 1× setting describes the export’s playback, not every original in-game circumstance.
For materials, inspect the mesh’s material slots and their Image Texture nodes. Check transparency at edges and any surfaces that look unexpectedly flat. Mario’s technical note warns that generic glTF lighting and filtering do not emulate an N64 framebuffer, and original runtime material switches need game-aware logic. Importing the file does not recreate those systems.
4. Diagnose a result that looks wrong
- No model in view: select the imported mesh in the Outliner and frame it before changing its scale. Check whether the object or collection is hidden.
- Plain surfaces in Solid view: switch to Material Preview before assuming textures are absent. If textures are still missing, inspect the material’s image references and check that the original download completed.
- Mesh present but no motion: verify the selected armature, action, track state and timeline range. A paused or inactive animation is different from a file with no animation clips.
- Different color or shading: compare unlit and lit views. Adjust your scene lighting and material settings on a working copy rather than treating a thumbnail as a color-accurate render target.
Finish with a reproducible check
Reopen your saved .blend file and confirm the model, textures and chosen walking clip are still available. Record the asset page, original filename and changes you made. For characters whose eyes or mouths stay fixed while the skeleton moves, continue with the expression tutorial; those changes may require a separate material setup.